
Revitalise Your Kitchen on a Budget by Painting Cabinets
Is your kitchen feeling a bit lackluster lately, but your budget is tighter than ever? Don't fret; we've got the perfect solution to breathe new life into your culinary space without breaking the bank. In the world of kitchen transformations, painting cabinets is the unsung hero, offering a remarkable change that won't leave your wallet gasping for air.
Your kitchen cabinets are more than just storage; they are the backdrop to your culinary adventures, the canvas upon which your kitchen's personality is painted. And in this blog post, we're about to unveil the art of budget-friendly cabinet painting, which can completely refresh the look and feel of your kitchen. Whether you're a seasoned DIY enthusiast or a novice looking for a weekend project, we'll guide you through the process, sharing tips, tricks, and inspiration along the way.
Step 1. Preparation
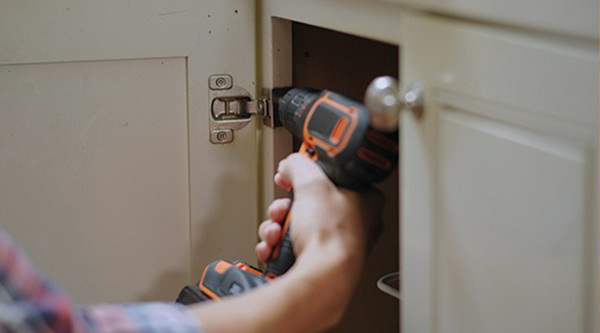
To kickstart your budget-friendly kitchen cabinet transformation, it's crucial to begin with precision and organization. Start by removing all cabinet doors and any accompanying hardware, such as handles and hinges. As you remove these components, take care to label each door, ensuring they can be reinstalled in their original positions. This step may seem meticulous but is essential in maintaining the integrity of your kitchen's layout. By taking these initial steps, you're setting the stage for a smooth cabinet-painting process, where you can unleash your creativity and breathe new life into your kitchen space.
Step 2. Clean
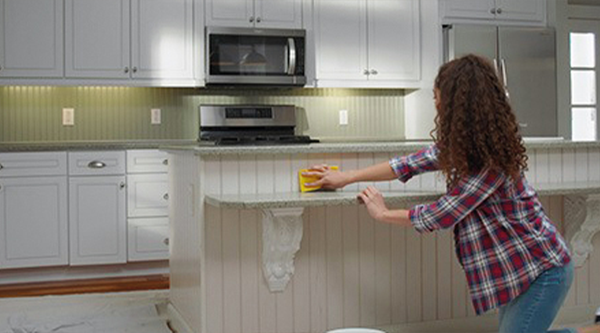
Prepare your cabinets for their vibrant transformation by embarking on a thorough cleaning journey. Use a high-quality cleaner degreaser to meticulously eliminate any accumulated grease and oils, the inevitable residue of kitchen life. Once your surfaces are spotless, give them a gentle scuff sand to ensure a smooth canvas for your masterpiece. Apply a primer like Fleetwood Bloxx-It, allowing it to dry before gently sanding again with a 'very fine' grit sandpaper. A final wipe-down with a damp cloth will rid your primed cabinets of any lingering debris, leaving you with a pristine surface, ready for the magic of Fleetwood Advanced paint.
Step 3. Paint
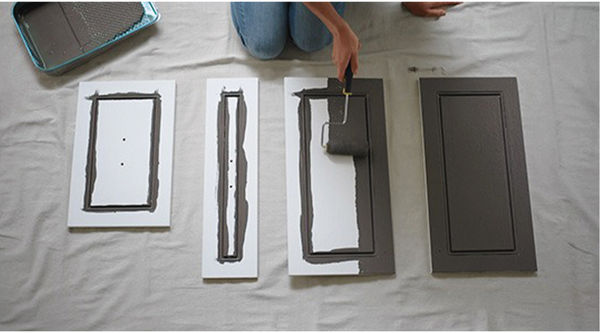
Now, it's time to bring your kitchen cabinets to life with a fresh coat of paint. We recommend Fleetwood Advanced Satinwood or Fleetwood High Gloss. Begin by using a 1" or 1 1/2" angled brush to delicately apply paint to the recessed and detailed areas of the cabinet door, taking care to avoid brush marks on the flatter and smoother sections. Without delay, move on to the remaining flat areas of the door, wielding a 4" microfiber roller. Roll over any overlapping brush marks or paint drips to ensure a seamlessly smooth surface, allowing your cabinets to shine with their renewed beauty.
Step 4. Reassemble
After applying the first coat of paint, exercise patience and allow it to dry thoroughly for a span of 24-48 hours. Following this, proceed with the same meticulous method to apply the second coat. Once again, give it another 24-48 hours to ensure it's entirely dry. At this point, you can complete your kitchen cabinet makeover by reattaching the hardware, adding the final touch to your freshly rejuvenated kitchen.
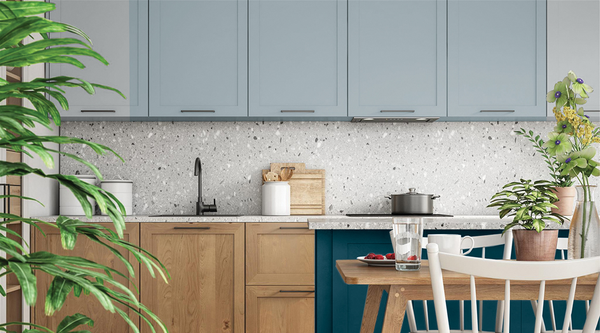
Congratulations, you've embarked on a budget-friendly journey to transform your kitchen cabinets, and the results are nothing short of spectacular. By following these steps, from the meticulous preparation to the artful application of paint, you've breathed new life into your culinary space without straining your wallet. Your kitchen now boasts a refreshed, vibrant look that's sure to inspire your culinary adventures for years to come. Remember, a little creativity, patience, and a few strokes of paint can work wonders. So, take a step back, admire your handiwork, and revel in the beauty of your kitchen's remarkable transformation. Happy cooking and even happier moments in your newly revamped space!
